Friday Fun Day and the Giveaway Stays Home This Week

Friday, September 30, 2011
Hi Everyone,

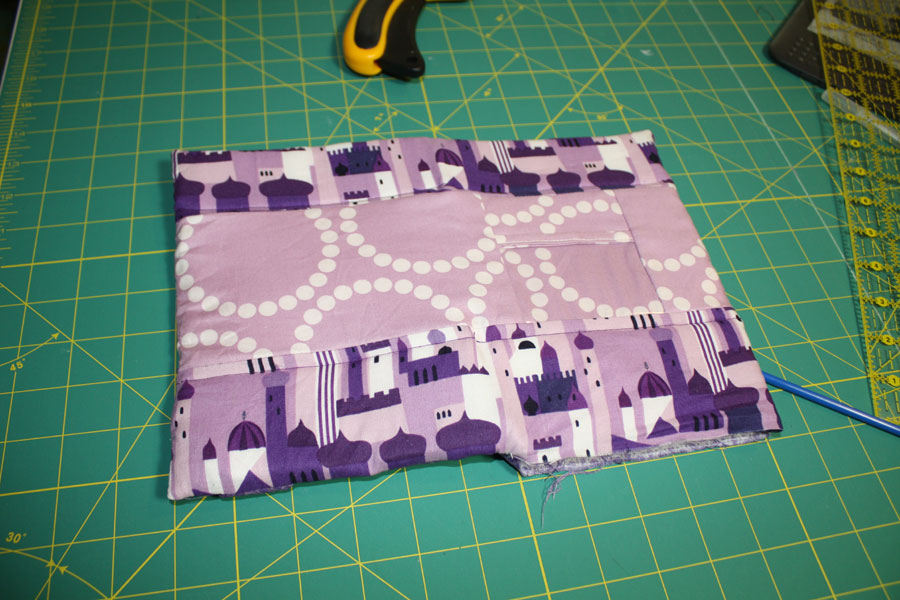
Here is a little sneaky peek of the tutorial that will be in the Newsletter tonight. Because no matter how crazy things get around here the amazing Mistress Brooke never lets me down. I love you Brooke! Yummy yummy Terrain...

Last month when I booked a class at A Work Of Heart for yesterday I had no idea how busy I would be. I felt a little guilty for playing hooky for 2 hrs to go to the class... but I had a great time. I learned a teeny tiny bit about soldering and made these adorable pieces...


I couldn't resist showing you the little Charm Pack I got from Kate Spain she is so sweet!

I got a package in the mail a few days ago from my friend Jackie she sent me one of her hand dyed silk scarves and some of her hand dyed fabric as a surprise... Isn't it beautiful? She has just opened an Etsy shop for her wares.

So here is the giveaway. How about a Rolie Polie of Delighted?

Be sure to come back tomorrow for an announcement about Delighted as well.

But for now here is how you enter to win. You only have to do one but if you do more you get more chances. Leave a comment for each thing that you do:

1. Leave a comment... any comment.
2. Go over to Amanda's blog and leave her a comment. You might want to say something nice about how much you love her fabric designs. :)
3. Go to Amanda's facebook page and like her. And/Or click the like button for my facebook page on the top right of this blog.

So easy. The giveaway goes until next Friday, October 7.

See you tomorrow! Have a wonderful Friday!

An interview

Wednesday, September 28, 2011
eep... Rhonda over at Quilter in the Gap did an interview with me that she will have in her podcast today. Very scary... everything you never wanted to know about me LOL If you want a pre-view go over to Rachel at Contented where she has some excerpts... so embarrassing.....

.... the other Monday

Tuesday, September 27, 2011
Hi Everyone,

Tuesday is the other Monday this week. I worked on this for a minute yesterday:
They are 3" blocks to make an 18" pillow for the Pillow Talk Swap. I hope my partner likes it. There are so many projects to do this month I am a little overwhelmed but I will persevere.

I finished my Mug Rug for the Scrappy Mug Rug Swap last night. I kinda love how it came out... batiks aren't my thing normally but my partner likes them and they did make some pretty leaves..
I am on a strip piecing kick lately. I pieced the strips of the batiks then cut out the leaf shapes on a diagonal to mimic the veins. I hope it isn't too simple. I am pretty proud of the fact that I drew the leaves because I am seriously handicapped when it comes to drawing even simple shapes.

I neve miss my Monday blog post... or I guess I should say rarely. So today is Tuesay the other Monday of the week :) I know some people hate Mondays but I like them. I always feel like it is a new beginning with so many possibilities for the week ahead. I hope your Monday was lovely and you have an even better Tuesday.

Ps. My friend The Bargain Babe said some sweet things about me on her blog... Thanks so much T :)

Friday Fun Day and the Giveaway

Friday, September 23, 2011
Hi Everyone,

Oh my goodness... My daughter doesn't do pop culture but my son does so now every Friday I hear him in my head singing that stilly Friday song... you know the one. I bet you have an idea of what I am giving away this week... Moroccan Mirage of course!
Go over to Happy Quilting to enter. You might like to say best wishes on Melissa's new baby while you are there she went in yesterday to have the baby ... wasn't it sweet of her to set up the giveaway for you guys before she did. I don't know how she gets it all done with all her adorable children and the designing and everything.

I thought I would show you all a little toy that I haven't mentioned before. One of the ladies in my Modern Quilt Guild is Kacie... she and her husband have developed a super fun quilt designing software that you can use on their website. She doesn't even know that I am posting this I just thought of it this morning :)

It is called Quiltivate

You can go here to check it out. If you are anything like me you can spend hours messing around with it :) Amanda Jean from Crazy Mom Quilts has written some tutorials for you over there as well. Here is a link to the blog that shows the blocks you can choose for the tutorials.

Something super fun happened yesterday. My little blog was visited by none other than the sweet, beautiful, amazing, generous Kate Spain. She left a comment on my post about Terrain being in and the 8 people that commented on that post are getting mini charm packs of Terrain. Talk about exciting. I just love that girl!
Have an amazing Friday everyone!

We All Need Something To Believe In... Giveaway and Stuff

Thursday, September 22, 2011
Hi Everyone,

I am a Christian. Nope not gonna talk about religion. I am just going to say that I believe we are meant to help those that are less fortunate.


My friend Jacque over at Lilypad Quilting agrees and today she has posted about a charity that is near and dear to her heart. Helping some orphan children. A lot of us (not all) are fortunate to have deep stashes accumulated over a few years. I know mine could use some culling. So if you have a little extra fabric that you can donate to a good cause. Please consider sending it to Malawi to clothe some needy children. You only have to pay postage within the US and send it to New York. I and a few other shops have donated some prizes for those that help out with the effort. I hope you will consider helping with this worthy cause.

I have made a new friend too (love it when that happens) her name is Annabella and she lives in Morocco.


Okay that right there is pretty cool. The other cool thing... she posts about what it is like to live there. She has an awesome quilting style and I could peruse her pictures for hours. She saw Moroccan Mirage and just had to get some for you all to win. I decided to sponsor her giveaway. So if you go over to her blog you can enter to win a fat quarter bundle of the Marrakech colorway (because she lives in Marrakech). You go girl!

That's all for now... see you tomorrow for Friday Fun Day ....


Terrain is here! Yippee!

Wednesday, September 21, 2011
Yah!

A Super New Quilt Along To Check Out

Hi Everyone,


My good friends Rhonda and Rachel are co hosting a quilt along. I always say I don't have time for a quilt along but if you look at the kick off post, here on Rachel's blog, I think you will see that the pace of this quilt along will be very easy... even for us time challenged persons. Rhonda has a podcast and she is interviewing Rachel today so if you haven't checked that out you can do that as well. The purpose of the quilt along is to teach quilting techniques, both free-motion and hand quilting. I know I can always use practice on my free motion so I am all in. I am sponsoring the quilt along and offering a prize at the end for a drawing for those that finish their projects. Go participate at the Flickr pool as well.


Could Terrain be here today? Here's hoping....

Talk soon!

Moroccan Mirage is here...woot woot woot!

Monday, September 19, 2011
Oh so pretty! Here

Monday, Monday, A Giveaway to Check out and Stuff...

Hi Everyone,

Today is gonna be fuuuunnnn! 'Cause I know UPS man is coming with something I am so excited to get. I can't tell you yet because it is a surprise..... but he will be visiting a few times this week to bring:


Terrain!

And:

Moroccan Mirage (this might even get here today)

Yippee! I need fabric to be happy! No more months like August without my drug of choice  (fabric that is)LOL

Let me introduce you to my friend Shanna she has been following the blog for a while and I can always count on her for some words of encouragement. Go check out her blog she has a super fun giveaway going on. While you are there be sure to take a jaunt through her photos she has a super fun modern scrappy style that I envy with all my heart! hehe

I started working on my Scrappy Mug Rug Swap #6 item this weekend... my partner loves jewel toned batiks so I dug deep (batiks not being readily at hand) and found some really pretty ones... they also had to be Autumn-ish colors (all you who know me... you know how difficult this was for me) but I think I found just the thing and I am pretty excited at how fun this is coming out...


This might be the front or the back because I am pretty much loving the back I am making too...

Have a supercalifragilisticexpialidocious Monday!

Talk soon!

Kindle Cover Instructions Finally

Saturday, September 17, 2011
I know you thought it would never happen :)

1001 Adventures Kindle Cover Sewing Instructions

Place 4 3/4" x 7 1/4" pieces of peltex centered on the 5 1/4" x  7 3/4" pieces of fusible fleece


Place the 6" x 8 1/2" pieces wrong side down on top of the Interfacing pieces and press to fuse all three layers together.


If desired you can quilt the pieces ... here is what mine look like I did uneven cross hatching (on purpose). These are your interior pieces lay them aside for a minute.


Elastic covers (skip if you are using ribbon or elastic that you don't mind leaving uncovered): Fold the 2 1/2" x 5" pieces in half right sides together and sew 1/4" seam along the long edge.


I wanted to show you one of my favorite sewing tools. This is a drawstring tool. You can get them at Joann or Hobby Lobby... or wherever :) It is great for turning tubes, pulling drawstrings (obviously), or pulling elastic through casing. I used it to turn the tubes and pull the elastic through them.


Just pinned through the seam allowance and the hole on the tool then pulled it through.


Pinned through the elastic and the hole and pulled.

When you get the eleastic to the end pin in two places to keep it from twisting when you sew.


Sew across each edge of the elastic and casing at about 1/8th inch.


Pin the elastic to one of the interior pieces that you prepared earlier. On the top and bottom they should ba approximately an inch apart and on the sides approximately 2 inches apart. Baste the elastic in place.


Optional pockets:

Fold your 6" x 15" piece in half width wise (when folded it should be 6 x 7 1/2) wrong sides together, and press.


Place the 5 1/2" x 7" fusible fleece at the fold on the wrong side centered, and fuse (from the fabric side).


Quilt if desired. If you don't quilt I would at the least top stitch 1/4 from the folded edge.


Fold the 6 x 7" piece in half (making it 6" by 3 1/2") the same way you did for the large pocket fuse the 3 1/2" x 5 1/2" interfacing to it. Place at the botton of the first pocket and baste each side.


Measure to the center (3 1/2) of the small pocket and mark. I like to use painter's tape.


Top stitch down the pocket at the center line. Back stitch at the top opening to reinforce.


Baste the whole pocket section, matching the bottoms, to the other interior panel (without the elastic).

--- end optional section---


Sew interior panels together, elastic section should be on the right.


Without pockets

With pockets.

If you are like me you can't wait to try it out:

From your exterior pieces pull the 4" x 1 1/4" piece. Fold in half length wise and press. Then fold the edges in to the fold on each side to make a binding for the vinyl pocket.


Place over the top edge of your vinyl piece and top stitch close to the edge catching in the top and botton of the binding.


Place the vinyl pocket on top of the 3 1/2 x 4" exterior piece and baste all the way around. Note: only put pins in where the binding is because the vinyl will show pin holes.


Piece your three center exterior pieces together in this order:


Be very careful when ironing form now on because the vinyl will melt.


Piece the three exterior strips together in this order:


Make the button loop by using the 2" x 5 1/2 piece of exterior fabric. Fold the same way you did for the vinyl pocket binding and top stitch along the edge. Fold in half and press down to make a flat point at the end and tops stitch to create the loop end.


Plave the loop on the side of the exterior that does not have the vinyl pocket edges matching and centered over the center strip. Baste down.


Put the exterior and the interior right sides together sew all the way around leaving the bottom of the front open for turning.

Hand stitch the opening closed and sew a button on... and Ta Da!

You are done:


Custom Post Signature

Custom Post  Signature