I know you thought it would never happen :)


Fold the 6 x 7" piece in half (making it 6" by 3 1/2") the same way you did for the large pocket fuse the 3 1/2" x 5 1/2" interfacing to it. Place at the botton of the first pocket and baste each side.


Be very careful when ironing form now on because the vinyl will melt.


1001 Adventures Kindle Cover Sewing Instructions
Place 4 3/4" x 7 1/4" pieces of peltex centered on the 5 1/4" x 7 3/4" pieces of fusible fleece

Place the 6" x 8 1/2" pieces wrong side down on top of the Interfacing pieces and press to fuse all three layers together.

If desired you can quilt the pieces ... here is what mine look like I did uneven cross hatching (on purpose). These are your interior pieces lay them aside for a minute.

Elastic covers (skip if you are using ribbon or elastic that you don't mind leaving uncovered): Fold the 2 1/2" x 5" pieces in half right sides together and sew 1/4" seam along the long edge.


I wanted to show you one of my favorite sewing tools. This is a drawstring tool. You can get them at Joann or Hobby Lobby... or wherever :) It is great for turning tubes, pulling drawstrings (obviously), or pulling elastic through casing. I used it to turn the tubes and pull the elastic through them.


Just pinned through the seam allowance and the hole on the tool then pulled it through.

Pinned through the elastic and the hole and pulled.
When you get the eleastic to the end pin in two places to keep it from twisting when you sew.

Sew across each edge of the elastic and casing at about 1/8th inch.

Pin the elastic to one of the interior pieces that you prepared earlier. On the top and bottom they should ba approximately an inch apart and on the sides approximately 2 inches apart. Baste the elastic in place.

Optional pockets:
Fold your 6" x 15" piece in half width wise (when folded it should be 6 x 7 1/2) wrong sides together, and press.

Place the 5 1/2" x 7" fusible fleece at the fold on the wrong side centered, and fuse (from the fabric side).

Quilt if desired. If you don't quilt I would at the least top stitch 1/4 from the folded edge.

Fold the 6 x 7" piece in half (making it 6" by 3 1/2") the same way you did for the large pocket fuse the 3 1/2" x 5 1/2" interfacing to it. Place at the botton of the first pocket and baste each side.

Measure to the center (3 1/2) of the small pocket and mark. I like to use painter's tape.


Top stitch down the pocket at the center line. Back stitch at the top opening to reinforce.

Baste the whole pocket section, matching the bottoms, to the other interior panel (without the elastic).
--- end optional section---
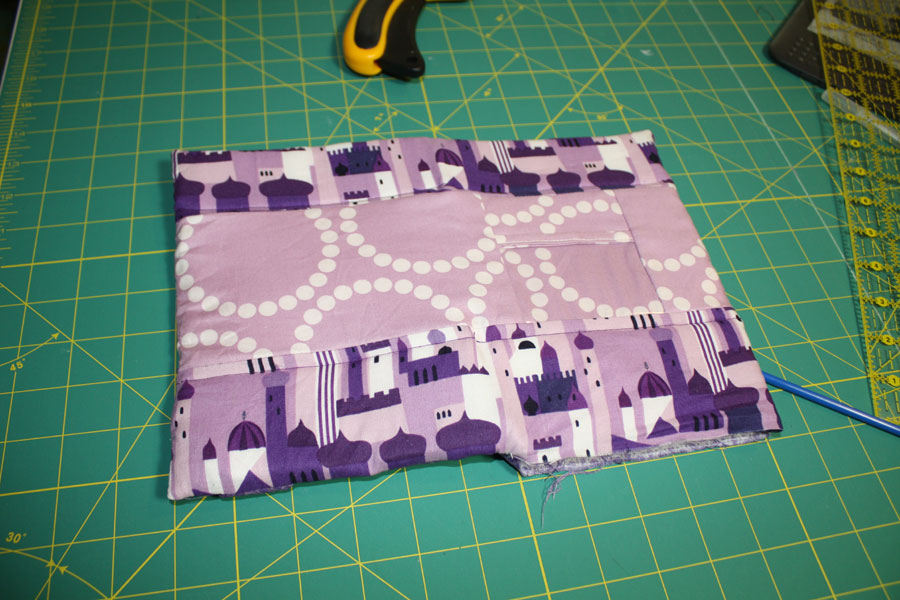
Sew interior panels together, elastic section should be on the right.


Without pockets

With pockets.
If you are like me you can't wait to try it out:

From your exterior pieces pull the 4" x 1 1/4" piece. Fold in half length wise and press. Then fold the edges in to the fold on each side to make a binding for the vinyl pocket.

Place over the top edge of your vinyl piece and top stitch close to the edge catching in the top and botton of the binding.


Place the vinyl pocket on top of the 3 1/2 x 4" exterior piece and baste all the way around. Note: only put pins in where the binding is because the vinyl will show pin holes.


Piece your three center exterior pieces together in this order:

Be very careful when ironing form now on because the vinyl will melt.

Piece the three exterior strips together in this order:

Make the button loop by using the 2" x 5 1/2 piece of exterior fabric. Fold the same way you did for the vinyl pocket binding and top stitch along the edge. Fold in half and press down to make a flat point at the end and tops stitch to create the loop end.


Plave the loop on the side of the exterior that does not have the vinyl pocket edges matching and centered over the center strip. Baste down.

Put the exterior and the interior right sides together sew all the way around leaving the bottom of the front open for turning.


Hand stitch the opening closed and sew a button on... and Ta Da!
You are done:


