We have a winner...

Sunday, September 29, 2013
Oops I forgot to post the winner of the Legacy Giveaway yesterday morning. Let's see who won some of this:


Mr. Random said:

and number 87 is:
BillieBee (billiemick) said...
I'm pretty much a hermit so I don't go out much at all. I just recently had a blast sewing with Chris that loves fabric making In from the Cold pattern and I do hexies and applique with Angie from A quilters Reading Blog.


I will email in a moment.

Thanks everyone! Have a beautiful Sunday.

Friday Fun Day... Fair Warning...

Friday, September 27, 2013
Hi Everyone,

Since the blogger feed doesn't go out until night time I am giving you fair warning about a sale this weekend. You can use the Coupon Code GOTCHA15 from tomorrow (Saturday 9/28) noon Eastern time until Monday noon eastern time for 15% off your entire cart. Sale includes everything on the site except the fabric clubs. Yes, even the sale section and all of the new awesome gorgeous Fall collections. We also just got in Alison Glass Party Streamers:


Legacy and Dream a Little Dream

Thursday, September 26, 2013
Legacy by Angela Walters is here... I adore the blenders in this collection so exciting.


Dream A Little Dream from Camelot is here too... such an adorable baby collection...


Sunnyside is here

Sunnyside by Kate Spain


Errors from the Newsletter

Sorry there were a few errors in the newsletter...

Friday is 9/27 and that is what I meant to say....

The locals only page got published by accident without all of the information and before I had the new classes up on the website. The link will still work properly but it will be this afternoon before I can get it all of the classes listed on our Calendar.

I am sorry for the confusion.

I love to see fabric in action

Wednesday, September 25, 2013
I bet you all do too... check out this quilt designed by Joel Dewberry out of Bungalow

The Dewberrys will will have a free pattern on their blog next week for it. I see a little applique in my future.

Twice As Nice is here

Tuesday, September 24, 2013
Twice as Nice by The Quilted Fish is here:


If you loved Sugar and Spice this one should be right up your alley.

Are you local?

Hey locals... come on by to meet our instructors and see the new offerings for classes. This Saturday 11am - 2pm


PS you can also enter the drawing for a giveaway of a Layer Cake of your choice.

Friday Fun Day... Copping out with a giveaway.

Friday, September 20, 2013
Hi Everyone,

I am not really copping out. I am heading to a retreat though. Oh you have no idea how much I need this break. I get to spend time with bunches of my favorite people like Little Bluebell, TraceyJay Quilts, Let's Eat Grandpa, Mermaid Sews, and some friends that don't have blogs :)... etc... can't wait. So the second tutorial I am doing for you will be a little late... like maybe next week :) I think you will forgive me though because instead am going to give something away and give you a coupon code to use ... we have over 900 fabrics in our sale section (I just put a bunch of new stuff there...947 to be exact) and you can use this coupon 800POSTS for an extra 10% off everything in your cart.

I just got notice that Angela Walter's collection Legacy will be here on Wednesday so how about a fat quarter bundle of one of the colorways (10) as a giveaway? 

All you have to do is a leave a comment here telling me about your favorite retreat or your favorite sewing time with friends. I will pick a winner next Saturday morning 9/28

Have a super awesome weekend! Keep an eye on instagram I will be showing what is happening with me this weekend.

Paloma Star Quilt Tutorial

Thursday, September 19, 2013

Hey everyone!!! I'm Sally, and I'm hijacking Julie's blog I'm so honored that Julie invited me over from Sally's Angelworks to share this fun, new tutorial with you!!

My Paloma Star quilt!

This is a super neat project you can whip up in an afternoon. So, let's get started!


Cut:
8  4.5" squares of Paloma bird patterned fabric
8  4.5" squares of Paloma blue flowered fabrics
4  12.5" squares of Paloma grey background fabric
4  16.5" x 2.5" strips of Paloma grey background fabric
8  8.5" x 10.5" rectangles of  Paloma grey background fabric
8  fat quarters of your favorite Paloma fabrics! (cut into 11.5" squares)
2  7" x 36.5" strips of Paloma grey background fabric


Put together your middle piece of the star.


Layout your 4.5" squares in a patchwork manner.
Sew the rows together...

To sew your rows together, I do not press at this point. I pin the seams and manipulate the nesting seams by hand while sewing. I seem to match a lot more seams this way!!


This is your middle panel of your star! yay!

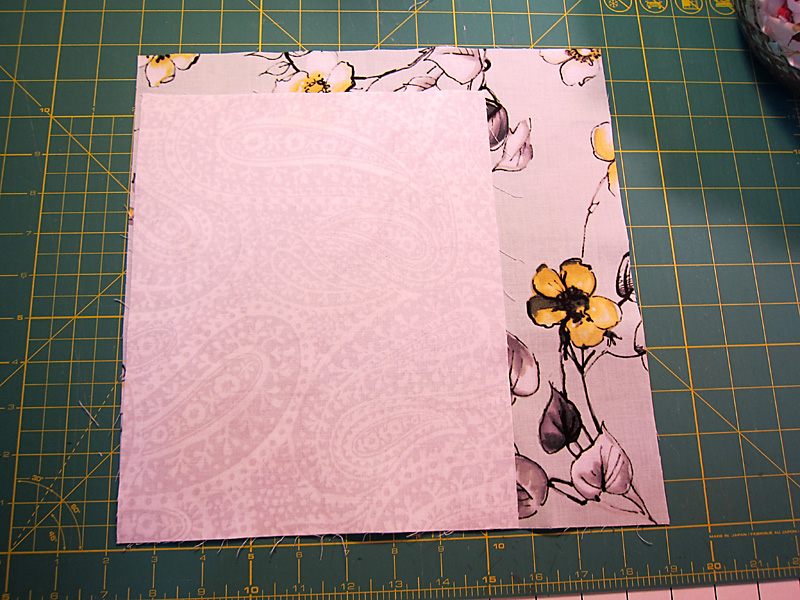
For the points of the star, you need to grab one 11.5" square of patterned fabric and one 8.5"x10.5" rectangle of background fabric.

Place them right sides together and grab your ruler and pencil.

Draw a diagonal line (see above!).

Btw, you should always listen to great music while doing this. I have a great Pandora cello music station I listen to...Yo-Yo Ma is the best!!! :)


Pin and sew!
Do not trim anything yet!!! (spoken from true experience!!)


Take your sewn piece over to the ironing board and iron your seam toward your patterned fabric. It will look all wonky and not really like you did it right! Never fear!!!


Take it back over to your cutting table and turn it with your wrong side of your background fabric facing up. Trim off all of the excess patterned fabric. You will have bulk. But I really like the way this looks when the quilt is done! It makes your star points pop out! yay!!! (If you don't like that much bulk in your star points, you can trim your background layer that is not showing. Make sure you are not cutting into the piece that IS showing!!)


This is what the back looks like after trimming....


And this is what the front looks like!!! Yay!!


Make 8 of these total! Make sure that 4 have diagonals drawn from the other side so that your points are facing the right side!!

Time to layout your star!! Sew your points together two by two!


Add your 16.5"x2.5" strips on the ends of the star points and sew. 

Layout your 12.5" background squares on the corners!

Sew your rows together.


Sew all of the rows together to make your main piece.


Add your 7"x36.5" strips of background fabric on the top and bottom!

Pin baste and quilt.


I chose to handquilt the star. 


I just love the way the birdies are handquilted!!


Then I quilted the background with straight line quilting. 


Voila!!! You have a wonderful little throw for you on the couch or for a new little sweet baby. 

Again, thanks to Julie for having me!!! I had a LOT of fun making this sweetie little quilt!!
Let me know over at Sally's Angelworks if you whip one up, too!! I'd love to feature it on the blog!

Blessings!!


_____________________

Hey, it is me, Julie... Super big thanks to Sally for the sweet tutorial! Lucky you if you read this far. I just marked down a bunch of new stuff to the sale section on the website and you can use this coupon code for an extra 10% off everything in your cart: 800POSTS you get first dibs :)

Christmas Table Runner Tutorial

Wednesday, September 18, 2013
Hi Everyone,

If you have been a subscriber to my newsletter you are well acquainted with my guest today. Brooke is the Queen of quick fun pieced projects. Whenever I need to make a gift in a short amount of time I look for a project from her. It is no secret that I love Winter's Lane and I had grand plans for it but alas no time to execute them. So this project is near and dear to my heart... everyone on my Christmas gift list is getting one. PS. Winter's Lane is on sale right now :)

--------------------------------------------


Winter’s Lane Table Runner Project


Hello, Brooke here from http://www.sillymamaquilts.com .  I fell in love with this new fabric line called Winter’s Lane by Kate and Birdie Paper Co.  this project uses fat quarters with linen borders.  This would be a great way to get a jump on the holiday sewing!


Supplies:

5 fat quarters of Winter’s Lane
½ yard of linen
½ yard of backing fabric and batting


I started with fussy cutting the tree print into 4.25 x 6 rectangles
 

I cut 3 inch strips from all of the remaining fabrics.


I sewed 3 inch strips to frame each tree on two sides as seen in the photo.
 

3 inch strip with birds on branches in between each unit, alternate direction of branches for table runner


Cut 4 inch strips from off white linen for borders


I did some narrow curvy line quilting in the blocks and


meandering in the border.


I decided to have the red print in the opposing corners and then the taupe tree print for the rest of the binding.  I really love how it turned out.


The finished size is about 15 x 48.
Hope you have enjoyed this project!  Happy sewing!

-------------------------------------------------------
Thanks Brooke!  This is totally awesome. I love how there are right side up trees on both sides of the runner so both sides of the table get to see them :)

Hope you have fun with this!

See you tomorrow.

Custom Post Signature

Custom Post  Signature