Get yourself some Spring...

Tuesday, April 29, 2014
Hi Everyone,

I am sorry if you are one of those that is in a place that is experiencing severe weather. My prayers are with you. Please move to California so you can come to the shop and play with us... we would love to have you. In the meantime Little Bluebell has picked these pretties to brighten up your day.

Vintage Spring

Sending you sunshine!

Julie

Yay! For more sewing... and some gorgeous new fabric.

Monday, April 28, 2014
Hi Everyone,

I have had some super productive weekend days this week... Here is the latest iteration of the Aviatrix Medallion:

#aviatrixmedallion This is not my usual style but I love it!

It is a little out of my comfort zone I am a lots of white background kinda quilter. I am so enjoying Alison's fabrics though.

Here are most of the blocks for the next border:


A pile of X and + Blocks for the #aviatrixmedallion  I have been taking them slow so I don't get them mixed up.

They make me so happy!

New in the shop this week:

Dreamin' Vintage by Jeni Baker I am calling it the Happiest Fabric on Earth. You can't help but smile when you look at it.


Then there is NouVelle by Pat Bravo. I think this might be my favorite collection from her... adoring the navy. I am making myself a skirt from the Navy with the light blue falling flowers.


Tell me about your weekend.... did you get to sew?

Talk soon,
Julie

How to cut fabric with Templates A Tutorial

Thursday, April 24, 2014
Hi Everyone,

No, I am not going to tell you how to make the Aviatrix Medallion Quilt. I am going to show you my handy dandy way to cut fabric with templates (as long as they are geometric) without having to draw them out and cut them by hand. It is accurate and super fast. One of the templates in the Aviatrix Medallion has to be cut more than 200 times... that is just a lot of cutting without a little shortcut. It took me less than an hour my way. So I hope this helps you all too. Oh and I finished my center by the way:


Draw your templates on to semi transparent template plastic with a dark marker. Something that won't rub off like a sharpie. Make sure the marker is completely dry before you start cutting. Using an acrylic ruler in a smallish size if you have one, (just makes it easier to flip it around you can use a big one if that is all you have) I used a 6" by 12", and some scotch tape. Tape the template to your ruler with one of the angles on the edge of the ruler.


If your template is not bilateral (meaning you can't cut it in half and have two mirror images) then you need to cut two templates. I will show you that in a moment. This piece is bilateral so it will be fine. Cut your fabric in a strip that is the width of the template between the two parallel lines. Lay the ruler and template on your strip so that the two parallels line up with the top and bottom of the strip and the point close to the edge.

Cut off the edge then flip your ruler over and line up the angle with the edge you just cut.
Yes, I know it is upside down but it doesn't matter as long as you are careful not to let it slip it it still works to cut along the edge with your rotary cutter. Flip the ruler back over and around and line up your next piece.


Continue on down the strip. I cut 4 layers at a time this way. Much more than that and you start to get a little less accurate.

The diamonds are just parallelograms too so you do this the same way.


Now, if you have a piece that is still geometric but is not bilateral you can still do this. You just need to cut more templates from the plastic. For the Aviatrix Medallion there is a piece that is like this so I cut it out of the template plastic twice and taped it on two different sides of my ruler like this:

 One side has the angle the other side has the straight.

Then you start with the side that has the angle at the end of your strip:


This is what happens if you don't have the other piece taped on...

You can't cut the next piece because the ruler is in the way :)

So with the side that has the straight edge taped on...
Now I know a lot of us old timers knew how to do this but some of the new sewists don't. So just a little help from me to you! Ta da!


Lots of pictures.... and some new stuff in the shop.

Thursday, April 17, 2014
Hey Everyone,

Well, we seem to have unburied ourselves from the mounds of orders over the weekend. I love the day after... Last weekend I took a few hours out and made some art with my favorite artist, Kristen Robinson. She comes down (she lives in my old home town in Oregon) to visit usually twice a year and I get the privilege of taking a class and hanging out with her and a bunch of awesome crafty friends.

Here we are... thanks for the Photo Lexi I wish you were in it. And Sinta notice what quilt I chose for us to stand in front of :)
Here are the panels that I created that day:

Notice the top one and the left one have fabric on them of course!

So yesterday once the last of the orders were ready to go (thanks to Colleen and Maxine) I got to pull out the new stuff that came in and get some pictures.

Here is a fun bundle of Basics from Patty Young... I adore those Type keys and dots!


Then I re-stocked the Domino Dots from Violet Craft's Waterfront Park. I had always wanted to make bundles with just the dots and I finally get to do that:


Then of course I fell in love with Stitch when it originally came out in just a couple colors now Michael Miller got smart and added a ton of colors and we have them. We have both Stitch Squares and Stitch Circles:


Yay.... pretty pictures!

A Winner and a Milestone...

Monday, April 14, 2014
Well... my 900th post slipped past without my notice. It was the one about the Aviatrix Quilt Along can't believe I am almost to 1000 posts... crazy...

Anyway... let's see who wins a few of these:


Mr Ramdon said:

100 even isn't that funny?

Lucy @ Charm About You said...
My first instinct is to say orange and pink but that's madness! Then I want to say navy and lime green because I love them right now but I'm going to go with the classic red and white since it's worked so well historically!

The Aviatrix Medallion Quilt Along

Saturday, April 12, 2014
Have you seen it? Elizabeth at Oh Fransson is having a quilt along for this ....
Photo by Elizabeth Hartman used by permission.

OMGoodness is that not the most gorgeous thing?  

We have most of the Kona's in the shop already I will add the few extra that are missing and then won't it be fun to have Elizabeth's FQ bundles this summer when they are released? I am making this quilt and you can too the pattern is on sale in the Oh Fransson shop until tomorrow. Now the only question is... white or low volume? Well I think I know what I will pick ;) Come play along!

Update: We have kits available here

Tax day sale....

Hey Everyone!

Big Sale


Take 20% off your entire order until 4/15/14. Use this coupon code: TAXMAN20 (if you are local and coming in to the shop just write the code down and give it to us at check out)

This means even the brand new Echino is only $14.40 a yard... that is unheard of!

Please remember that our system does not hold something if it is in your cart. Sometimes this means someone may check out with it before you do and we might be out of it when we get to your order. We will let you know right away if this happens and either refund or substitute at your request.

Please allow extra processing time during sales, we will ship just as quickly as we can.

**excludes previous orders, clubs and BOMs

Friday Fun Day - Color Me Happy Bathmat Tutorial and a Giveaway

Friday, April 11, 2014
Hi everyone! I'm Megan and every once in a while I blog about my sewing {and other} adventures over at A little bit of my life, but today I'm here at The Intrepid Thread to walk you through sewing a bathmat.  Recently my husband and I purchased our first home {a fixer-upper} and most of our time has been dedicated to fixing and improving things around the house.  When Julie asked for tutorials to share it was the perfect excuse for me to put down the Sawzall and dig out my sewing machine from behind all our boxes.

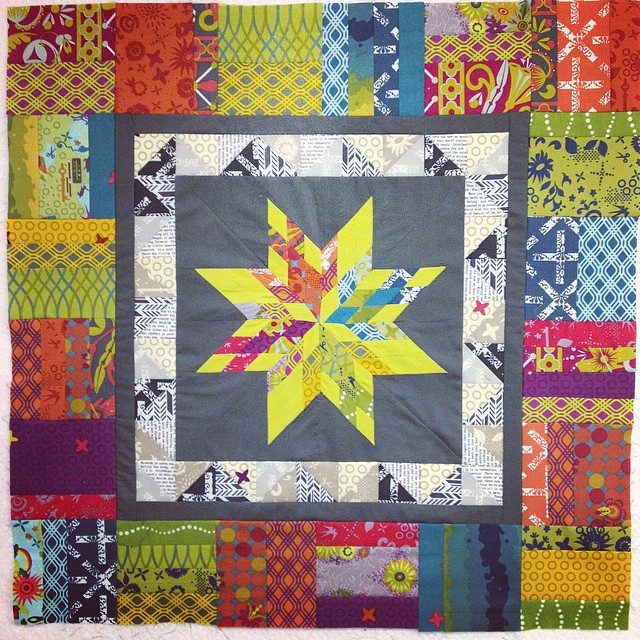
One of my favorite parts of sewing {and quilting} is designing the pattern and I'm a big fan of colored pencils and graph paper for this.  The bright, colorful and graphic nature of the Color Me Happy fabric totally lent itself to a bold, geometric design - perfect for half-square triangles, rectangles and squares.  I've got a thing for some hand lettering too and had to throw in the paper-pieced letters.

First, let me show you a little bit more of the design.  Then I'll walk you through the half-square triangles and paper-pieced letters.  After that, it's just stitch, flip, press and you're done!

Since our finished block size will be 4" and all seams are 1/4" we'll start with the large half-square triangles made from two 5" squares.  The rule of thumb being - start with a square 1" bigger than your finished block size.  {i.e. the small half-square triangles finish at 2" therefore they start with 3" squares}

Place two 5" squares right sides together. Using your ruler and a pencil, draw a line diagonally between two of the corners.  Stitch 1/4" from each side of the line using the line as your guide. Cut the square diagonally in half along the pencil line and press open along the seam.   Using the 45 degree line on your ruler and cutting mat square up the half-square triangle block to 4 1/2" {or 2 1/2" for the small ones}.  Make sure that the diagonal seam runs from corner to corner through the corners at 45 degrees.

Now let's walk through the paper-pieced letters. Each letter has the component sections numbered in the order they should be sewn.  As you can see in the 'W' above, there are 4 components in this one letter.  Each component will be sewn together separately and joined at the end to make the 'W'.

The trick here is that since we don't want our letters mirror imaged we'll be stitching with the backside of the paper facing up.  Luckily the dark line through the graph paper is still visible enough through the backside.

Take component #1 and scraps that are large enough to cover the area.  I like to go a bit big on the scrap size just to make sure everything get's covered with at least 1/4" of over hang {for future piecing}. Place component #1 face up on your table and then place the first scrap {green here} also face up on to so that it covers the green section labeled '1'.  Next, place the terry cloth scrap {or your cream colored scrap} face down on the green scrap {i.e. right sides together!}.  Shorten your stitch length.  Stitch along the line between '1' and '2'. Fold your paper back along the stitching line.  Place the 1/4" line on the edge of your ruler {hopefully it has one} along the folded edge of the paper and trim the excess fabric here to 1/4".  This will reduce bulk, give you a 1/4" seam, and a more clean looking finish.  Fold the paper back into place the fold the cream fabric back along the seam you just stitch.  Press! Repeat these steps to finish up component  #1 and component #2.  Match along the sides, right sides together, and check that the paper on either side would match up.  If you were to stick a pin through the paper corner it would hit the corner of the paper of the component on the other side. Stitch along the edge of the paper. This is also a 1/4" from the edge of the fabric. Press along the seam. Repeat for all components of the letter {the other letters have fewer components than the 'W'} in the order in which they're numbered.  And press!  It's always key to press each seam and remember to trim to 1/4" before moving on to the next seam.
Once the letter is complete, square it up to 4 1/2" and remove the paper. The shortened stitch length helps with this and acts like a nice perforation.  If small bits of paper remain trapped under the stitching, gently scrape with your fingernail to remove. Putting it all together... 
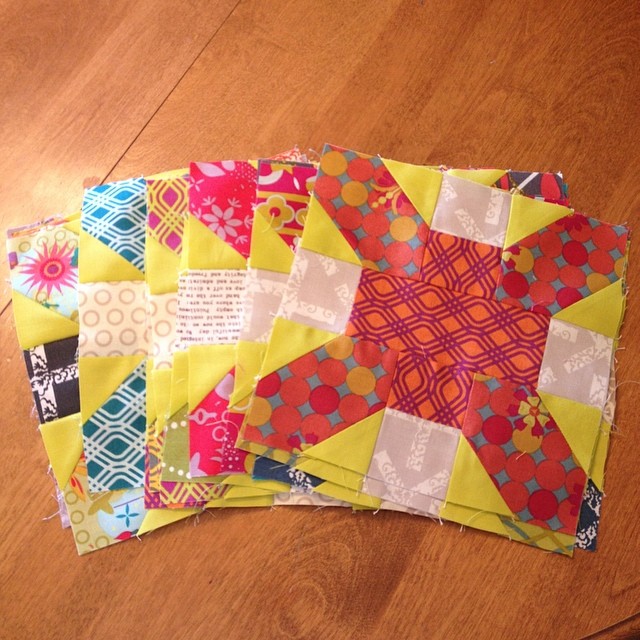
Using the diagram, lay out the squares and begin stitching together. 2 1/2" x 2 1/2" squares get combined with other 2 1/2" x 2 1/2" squares {and 4 1/2" x 2 1/2" rectangles} to make pieced 4 1/2" blocks.  Take care with pinning to match all the corners together. Pressing the seams open will reduce the bulk - a good thing since we'll be standing on this bathmat. Once all the 4 1/2" blocks are pieced, lay everything out again. In rows, pin every two blocks right sides together.  At this point, I take care to make sure everything is in order and then I chain piece by feeding each unit into the machine, one right after another, without pausing to cut the thread between until all the units are stitched. Press and repeat until you've got long rows.  Then, with right sides together take the first to rows and pin along the long edge.  Remember to take care to match the perpendicular seams.  To keep things in place I like to pin closely on either side of the seam. With the top stitched together, give it a good pressing and measure it. Cut your backing {this fun grey towel} to match the top. Note, my top didn't quite come out as the correct dimensions that I had planned. Not to worry though, I just cut the backing to match and all was fine and dandy. Pin the top to the bottom, right sides together {again}.  Stitch around the perimeter, but leave a 3" gap on one side.  Here it's a good idea to lock your seam {stitch forward and backward} at the beginning and end since we'll be putting a little bit of stress on the seam when we turn the mat back right side out.

Turn right side out through the opening and take care to push the corners completely out.  Press around the sides - especially work on getting the backing to stay on the back as it has a tendency to roll to the front.  Tuck the raw edges of the opening in and press as well.  Then stitch all the way around the edge.  This gives a more finished look and will close up the opening. There you have it, a completed bathmat!  For a little bigger look at the pictures in this tutorial feel free to see them in this album.

Thanks Julie, for giving me an excuse to get the sewing machine out.  And for giving me the opportunity to share this tutorial with your readers.  Happy sewing!

Thank you so much Megan! This is adorable! I love your shoes peeking out in that last picture.

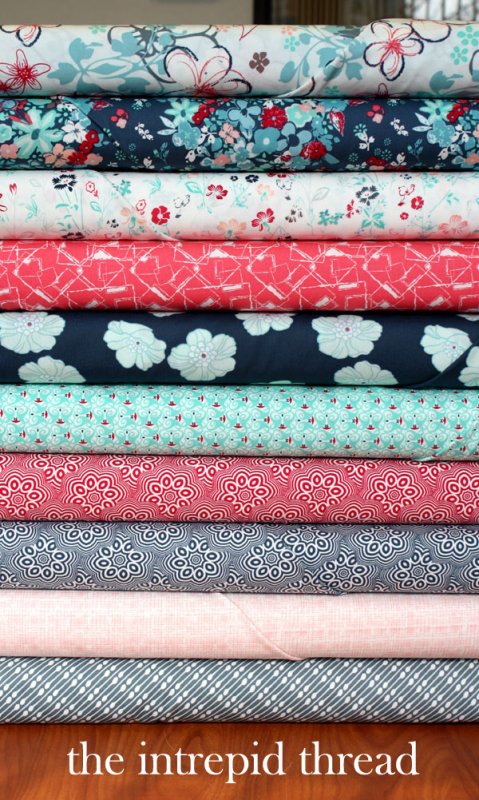
We are hosting a giveaway over at Maureen's today as well... so go over there to enter to win this sweet Custom bundle:

We also have these for sale in the shop.

Custom Post Signature

Custom Post  Signature