Showing posts with label True Colors. Show all posts

Tula Pink, Lizzy House, and Alison Glass... Oh my!

Sunday, March 29, 2015
Happy Monday Everyone!

I decided to put a pre-order for 5 new collections that are coming.... You all seem to like to make sure you don't miss something. These are the 5 collections that you all mentioned most in your comments from our 1000th post Giveaway... and luckily they were all ordered and in the works already... SCORE!

Just a reminder about pre-orders. You need to order each collection separately and all separately from regular orders as well. They come at different times and this allows me to keep better track of them. Thanks for your help :)

These are not in chronological order :)

First of all we have Tula Pink's True Colors which is arriving in early May:


Alison Glass' Ex Libris Arriving in late April


And three from Lizzy House. Arriving in Late April Mini Pearl Bracelets


Butterflies... this has already been shipped so it should be in by the end of the week:


And Natural History due in May.


Don't Forget we still have these Cotton + Steel Collections for Pre-order as well:

Black & White
Tinsel
Spellbound

And for two days only you can get 10% off your pre-order or any order (except gift certificates, BOMs, and clubs) with this coupon code OHMY10 it expires Midnight Tuesday 3/31/15

Botanics, True Colors by Heather Bailey, and Rapture

Wednesday, November 27, 2013
Wow, I feel like I have a lot to say lately :)

Botanics is here. We have all of the prints in stock.  We also have all of the matching Kona colors (we added 11 yesterday) You can order fat quarters or half yards.... we also restocked the text prints in black and navy from Architextures.


Heather Bailey's True Colors matches Lottie Da... gosh I love those tangerines....


If you are in the middle of a winter storm maybe Rapture can warm you up... I adore these Summery colors .


Leaf (feather) Quilt Block Tutorial

Friday, November 22, 2013


Hi Everyone,

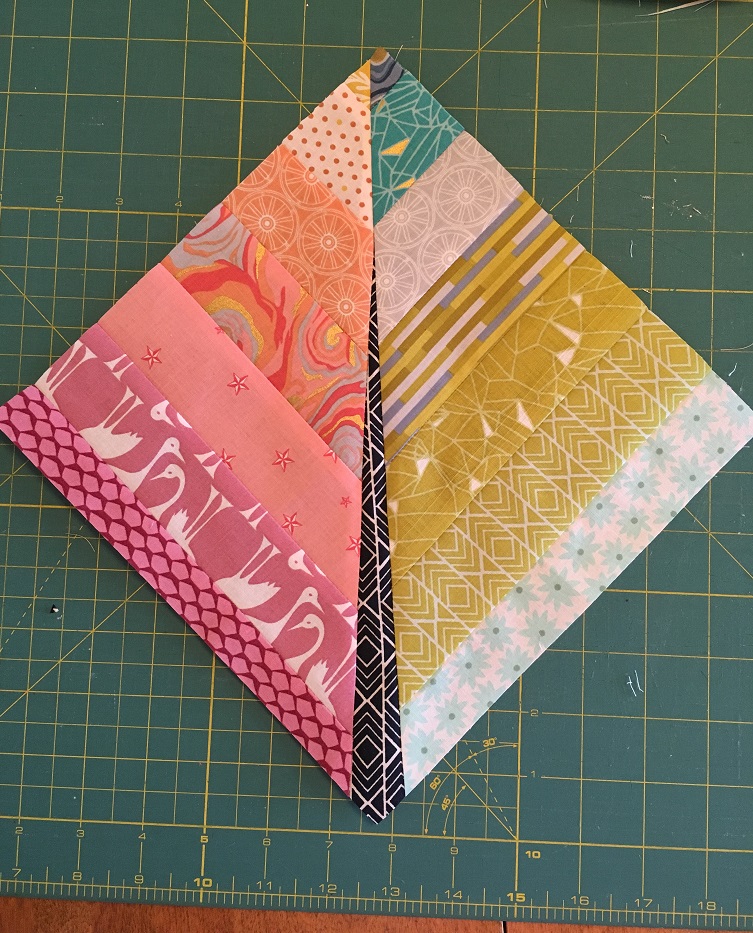
I had so many lovely comments about the blocks I made last weekend that I thought I would write a little tutorial for you. I have to admit am I kind of in love with them myself. Some people are calling these feathers and that is fine... I choose to call them leaves because that is what I set out to make :)
Updated pictures as of 4/29/17 and here is a downloadable PDF


This Tutorial Makes Two 9” (unfinished) Blocks

Supplies:
14 - 2” x 9 1/2” Strips for Leaf
4 – 3 ½” Squares for Background
1 – 1 ½” x WOF Strip for Stem
Instructions:
Lay out 7 strips for each side of your leaves. I chose to do one side in warm tones and one side in cool tones but you can choose whatever you like of course. If you decide to add a low volume piece try to put it in a different place on each side. 


Sew the strips together to form two rectangles as shown.


Square these units to 9 ½” by cutting approximately 1/2 “ off each end.


Lay the units out so that the strips are horizontal. Cut units on the diagonal. Make sure to cut from left top to right bottom on one and right top to left bottom on the other. If you are making more than 2 blocks just be certain to cut half one way and half the other. 


Lay out your two halves so that the stripes form a chevron in the center.


This is the sort of tricky part but not really… just look closely at the picture. Lay the left side of the leaf on the stem fabric strip so that the bottom of the leaf is next to the left edge of the bottom of the strip and the top edge of the leaf is ¼ inch from the right edge of the strip at the top.


Sew ¼ from the edge of the stripped piece.


Trim close to the edge of the stripped piece.


Press toward the stripped piece


Lay the right side of the leaf on the stem fabric strip so that the bottom of the leaf is next to the right edge of the bottom of the strip align along the edge of the stem fabric so that the stripped pieces overlap at the top. 


Sew ¼” seam.


Press toward the stripped piece.


Square the block to 9” keeping the 45 degree angle line on your ruler somewhere in the stem fabric. It doesn’t have to be perfectly down the center because leaves are organic (and so are feathers).


Draw a line diagonally on the back of each of the background 3 ½” squares.


Line up your squares on the outside corners of the leaves as shown.


Sew down the marked line and trim.


Press and Voila... your blocks are done! Please, if you use this tutorial all I ask is that you give me credit and link back to me. You are welcome to make things to sell with it as well.  Every once in a while I do something I am extra proud of and want a little credit :) Thanks so much! Also if you make some we would love to see them please post to Instagram with the hashtag #featherleafblock


 Here is the original picture:


and the original quilt

 I am adding 2"sashing between the blocks so they look like this.


Custom Post Signature

Custom Post  Signature