Hey Everyone,
I made some fun napkins for myself last week and some kind souls on Instagram asked for a tutorial so here it is for you :) This makes them super fast and easy and so cute with two of your favorite fabrics.

I made some fun napkins for myself last week and some kind souls on Instagram asked for a tutorial so here it is for you :) This makes them super fast and easy and so cute with two of your favorite fabrics.

Double Sided Napkins (printable PDF)
All seams are 1/4" unless otherwise stated.
Cutting:
1 - 18" square of exterior fabric ( you can make it bigger if you want a bigger napkin)
1 - 16 1/2" square of interior fabric ( you can make it bigger as with above as long as the interior is
1 1/2" smaller than the exterior)
Instructions:
- Fold to find the center of each of the four sides on the exterior and interior fabrics and mark by ironing a small crease or inserting a pin.

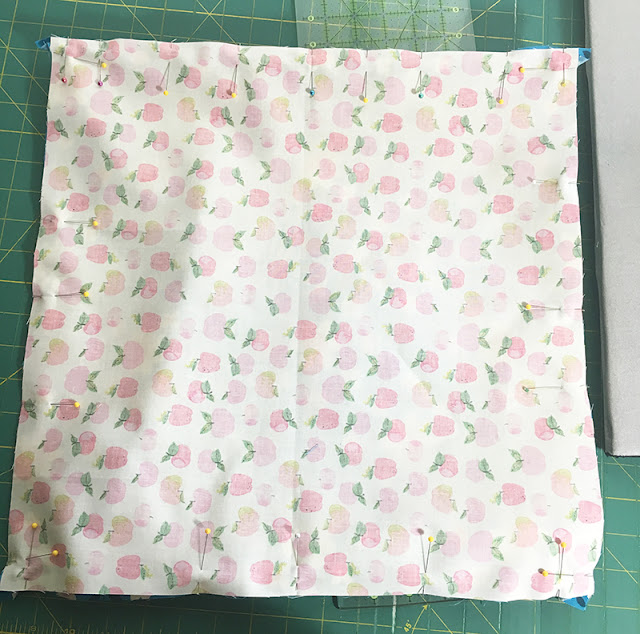
- Place the exterior and interior fabric right sides together.

- Pin the two squares together at the center of each of the four sides.

- Pin gradually out from the center on each side to the right and left off the center pin until you have all 4 sides pinned. You will have open dog ears on each corner, but this is correct.
- Starting 1/4" from one corner of the interior piece, and keeping the dog ear out of the way, stitch down one side ending 1/4" from the corner. Lift your presser foot and move the dog ear out of the way before continuing down the next side. Repeat for three of the sides. On the fourth side leave 2"-3" in the center open for turning.

- Press out toward the edges.

- Fold on the diagonal (with the wrong sides showing) putting the raw edges together.

- Place your ruler with the top edge on the fold and the right edge next to the end of the stitching. Mark along the right edge with a pencil. This is on the inside so it won't show as long as you don't use something that will bleed through. Repeat for all 4 corners. ** Don't get confused I switch fabrics here because my photos came out too dark. It started raining the day I was making the first batch.

- Stitch on the marked lines.

- Trim at 1/4"

- Turn out through the opening using a turning tool of some kind (I like chopsticks) and poke out your corners.

- Press. The seams should fit nicely inside of the faux binding edge. Press the opening so that it mimics the faux binding.

- Top Stitch 1/4" from the edge all the way around pivoting at the corners, and you are done.


Note: For a more professional finish when top stitching…
Lengthen your stitches by .5. When you start out, pull your bobbin thread up
through both layers do not back stitch. When ending leave long tails. Make
knots in the thread close to the fabric and using a hand sewing needle pull the
tails of the thread through to end between the layers of the napkin. The small
knots will pop through to the inside if you give them a swift tug.
Hope you love my little tutorial.
Have fun and I will see you in a couple days!
Love,


great tutorial! and love your little tips throughout.
ReplyDeleteWe are moving into a new home and I want to make cloth napkins. Love this tutorial and can't wait until the move is accomplished and I can sew again.
ReplyDeleteI love this! It looks so cute and easy. Thank you!
ReplyDeleteWow, what a great way to do these, thanks!!!
ReplyDeleteGreat for gifts. I made blankets like this. Thank you.
ReplyDeleteBarb