New Tilda Challenge with a free Pattern and Prizes

Monday, November 25, 2019
Hey Everyone,

Tomorrow is my Birthday... and I am hosting a new challenge with prizes and thought you might want to get in on the action.


This might look slightly familiar. I updated it with Tilda's new collection Old Rose (which we have in stock) and I am hosting a challenge. If you make it along with me these next couple weeks you have a chance to win a fat eighth bundle of Tilda fabrics and some other fun little bits... as well as bragging rights.

Here are the Rules:

1. You have to sign up here  you will get the pattern when you do.
2. You have to make something with at least one of each of the blocks in it. So one cottage, one house, one tree, and one star block :) Just the top I won't ask that you have it quilted.
3. Post a picture in our Challenge Group on Facebook by December 14th so we can see it or post it on Instagram with the hashtag #IT_TildaChallenge

That's it! Join us on the Facebook page for the video starting today.

Tilda Club and a Challenge with Prizes

Tuesday, October 8, 2019
Hey Everyone,

It has been a hot minute since I showed up here. I have been doing videos over on my Facebook page and running the Tilda Club USA. Now I am hosting a challenge with prizes and thought you might want to get in on the action.


This might look slightly familiar. I updated it with Tilda's new collection Old Rose (which we have in stock) and I am hosting a challenge. If you make it along with me this week you have a chance to win a fat eighth bundle of Tilda's Summer Collection Lazy Days, a Mini Tilda Kit, and some fun little notions as well as bragging rights.

Here are the Rules:

1. You have to sign up here  you will get the pattern when you do.
2. You have to make the table runner :) Just the top I won't ask that you have it quilted in a week.
3. Post a picture in our Challenge Group on Facebook on Monday October 14th so we can see it or post it on Instagram with the hashtag #IT_TildaChallenge

That's it! Join us on the Facebook page for the videos.

4 Great Resources for Sewing Your Own Wardrobe

Tuesday, April 30, 2019
Hey Everyone,

Today on Facebook I am starting a series on making and fitting your own clothes.

There are a few great resources I want to share with you here:

First of all there are two wardrobe planners that I love:

1. Seamwork's Free Wardrobe Planner they have a sew along twice a year for building your own wardrobe too.

2. Tina Given's Free Wardrobe Planner she is starting up a wardrobe make along very soon...

3. My Measurements Worksheet which I made specifically for the video series

4. A free basic tank Sorbetto pattern from Colette that we will use in the video series as well.

So grab your freebies and join me on Facebook the next few Tuesdays and Thursdays and let's make some beautiful clothes!

A new video series starting Tuesday.

Sunday, April 28, 2019
Hey Everyone,

If you have always wanted to make your own wardrobe and are looking forward to getting started with #memademay2019 you will love this... I am doing a video series starting on Tuesday on Facebook (I will post a link here when it is done if you can't make it live) teaching how to make yourself a sloper for blouses. This is a tool that will help you fit patterns so that you won't have to make a muslin for every piece of clothing you make.

I hope you will join me. Tuesday bring a measuring tape and a notepad and meet me on Facebook.

Have a great Sunday!

What I have been up to lately... and a free pattern.

Saturday, April 27, 2019
Hi Everyone,

About a month ago I decided to start going live on Saturday afternoons on Facebook. It was scary and it still is but... Hey, scary can be fun :) Join me on most Saturdays at 1PM for a chat and some sort of teaching. I am calling it Saturday Stash Buster Club (who remembers Scrappy Stach Buster Club I did a few years ago?). Right now I am teaching how to make my Heartline Quilt:

This was hanging in my shop for years and people always asked for a pattern but I was so exhausted I never had time to do it. So silly really! So I made a pattern for it and I even added a bonus pattern with applique (that quilt isn't finished yet ) and I am offering it for free.

Here is the applique pattern that goes with it.

If you are already a subscriber to my newsletter this will be delivered to you on Monday morning.

So Click Here if you want the free pattern.


Tutorial for making a leather B6 Size Traveler's Notebook with Cricut

Wednesday, April 24, 2019

Hey Everyone,


I have been in Japan...


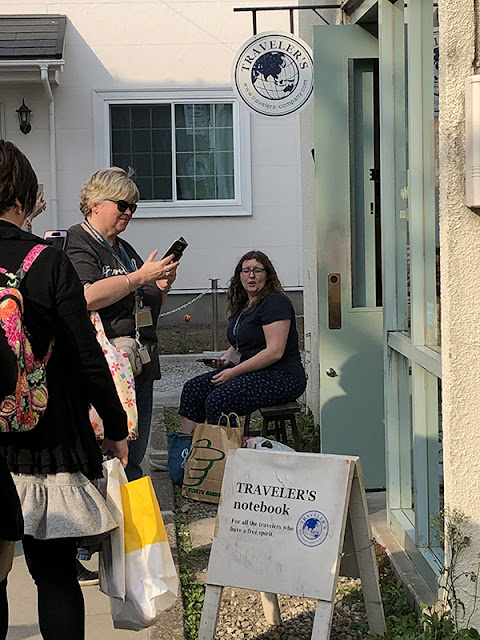
 I know isn't that crazy? It was so exciting and if you follow me on Instagram or on Facebook you probably saw it. It was amazing. I went with friends and toured a bunch of Stationary Stores one was 16 floors of nothing but stationary, art and office supplies.  You might have seen that I love planners (I have shared them before) and one type of Planner is called a Traveler's Notebook system. We went to the original Traveler's Notebook factory in Japan.


I designed a Traveler's Notebook cover way back about a year maybe a bit more ago... I was afraid to sew it though... I know so weird for me but I wasn't sure how the sewing machine would do with the two pieces of leather. It turns out it was no problem at all as long as I sewed slowly it worked just fine. Just take a scrap and sew a few stitches first to make sure you have your tension set properly.

This is a sponsored conversation written by me on behalf of Cricut. The opinions and text are all mine.


I have a dream of packing up my Easypress2 in it's handy dandy Easypress Tote and carrying it off to a Planner Meet up and making people their own personalized monogrammed TNs (Traveler's Notebooks)...


If you want to make one for yourself follow along below.


Traveler’s Notebook Tutorial


(Links below are affiliate links I may receive compensation at no extra cost to you)

Materials:

Leather 9” by 13” for Notebook (I used burgundy)
Leather 4” by 9” for Spine (I used gold)
3mm Elastic Cord to match
Upholstery Thread
Leather Sewing Machine Needle
A sewing machine that is strong enough to sew two thicknesses of leather
Cricut Iron on vinyl
Cricut Easypress2
Cricut Maker with a deep cut blade.
Awl
Large Eye Tapestry Needle

Optional: 

Cricut Brightpad

Cutting file for Cricut can be found here: https://design.cricut.com/#/design/75028010

Instructions:
1. Using the cutting file linked above and your Cricut Maker cut leather notebook cover and spine.


2. Using matching upholstery thread and your leather needle sew a detail stitch all the way around the cover approximately an 1/8th inch from the edge. Sew slowly to avoid breaking your needle. Mark the spine with a water-soluble pen approximately ½” from the scalloped edges.

3. Measure to find the center of the notebook and the center of the spine and align them. Use wonder clips and two scraps of fabric (to keep the clips from marring your leather) to keep the spine from shifting as you sew. Sew on the marked lines to attach the spine to the notebook.

4. Use your preferred color of iron on vinyl to cut out your monogram. I used gold. Don’t forget to mirror your degsin before you cut it, because your design is a letter you don’t want it to be backwards :)

5. Weed the design. I cut two different designs because I wasn’t sure which I liked best. I used my Cricut Brightpad to easily weed these tiny designs.
6. Decide which design you like best and where you want to place it on your notebook.

7. Use the Easypress2 set to 305 (I discovered this worked after trial and error). I used the Easypress pressing sheet between the press and the vinyl backing sheet because I knew I would have to hold it down for a little while to get it to adhere to the leather and I was afraid the backing might melt, although I have never had that happen I didn’t want to take any chances with the leather. I pressed for 30 seconds then checked it.

You should be able to see the grain of the leather in the vinyl if it is pressed well enough. As you see here. Once it is heated enough wait until it cools then peel off the backing.

8. Make a mark approximately ¼” and ½” down from the top and up from the bottom edge in the center of the spine. Either use a small hole punch or an awl to make big enough holes to use your tapestry needle to insert your elastic bands. Go out through the top hole, in through the second hole, out through the third hole, and in through the 4th hole. Pull the loose ends together at the center and tie a double knot. Make sure the elastic is snug to hold your notebook in place.


You will notice that I didn’t center my spine I made a mistake when I measured and once you sew leather you can’t rip it because it shows so I made due. Measure good the first time :)

9. Use the awl to make another hole in the center of the spine to insert an elastic to keep the notebook closed.
10.  I waited until my Easypress was cooled down then used it as a weight to hold the spine closed for a few hours to train it to stay closed.


Then just add your notebook or journal and enjoy. This will fit B6 size inserts which can be found in many places. At the link above you can find some pretty floral ones, and here you can find some dot grid ones that are more customizable at Amazon..

I hope you love it!


I will be back soon!
Love,

Let me introduce you to the new Easypress 2 Totes...

Wednesday, March 6, 2019
Hey Everyone,

You have seen my posts here,  here, and here about my Easypress 2 and how much fun it is to use it to make iron on projects. Well, Cricut has come up with these great tote bags that allow you to carry your Easypress and take it on the go to retreats, classes, or crafting with friends.


You can take your Easypress 2, Safety Base, Mat, and small tools with you in one bag. The bag is heat resistant so even if you have to pack up fast you don't have to worry about putting your hot press in the bag . The bag is cushioned all the way around so the Easypress won't get beat up while you travel. The fabric is really durable too. It has a really strong shoulder strap and a soft cushy handle with which to carry it.

As you can see there is a velcro strap inside to keep the press from moving around.
There are three sizes of tote to match the three sizes of Easypress 2.

There is a front zipper pocket on each tote and a back pocket with a magnetic closer. Each back pocket is slightly different. On the small tote it is more of a slip pocket, on the medium tote it is pleated and the large tote (as you see below) is pleated snapped and zippered so that you can open it all the way out and include lots of stuff or keep it zipped and compact.
One thing to know is that even though the original Easypress is the same size as the medium Easypress 2 it doesn't fit in the medium bag because the safety base is wider on the original...
But it fits great in the large tote :)
Here is a simple guide:

Tote Compatibility
Small - Cricut EasyPress 2, 6" x 7"
Medium - Cricut EasyPress 2, 9" x 9"
Large - Cricut EasyPress 2, 10" x 12" and Cricut EasyPress, 9" x 9"

 I can't wait to take my Easypress with me everywhere. Have I mentioned how flat it makes quilt blocks? Seriously!

Talk soon!

This is a sponsored conversation written by me on behalf of Cricut. The opinions and text are all mine.

 PS. Links in this post may be affiliate links which I may receive a small amount of compensation for at no extra expense to you.

Wish You Were Here - Free Quilt Tutorial with Cricut Maker

Wednesday, February 20, 2019
Hey Everyone,

I am back with a new Cricut Sewing Project. You all know I love my Cricut Maker and it's handy dandy rotary blade. I have always wanted to make a Hawaiian applique quilt but the thought of cutting out that applique gave me the chills. My Cricut Maker made it so easy I was able to finish this quilt top in just a few hours.


The designs scallops reminded me of postage stamps so I called it Wish You Were Here, like a postcard from Hawaii :)

I picked a Quilt Kit From Cricut's Designer Fabric to make the quilt. Here it is with my handy dandy maker.
Here is the maker cutting out one of the applique pieces.

I never get tired of watching the magic happen.

Wish You Were Here Quilt

42" Square


Find the cutting file on Cricut's Design Space here.

Cutting
9 - 10 ½” squares background for blocks (yellow and grey)
9 - 10 ½” squares for applique cutting (yellow and grey)
16 – 3 ½” squares sashing cornerstones (grey)
24 – 3 ½” by 10 ½” rectangles sashing (white)
Binding and Backing

Instructions
1. Apply your applique squares to your cutting mat for your Cricut with the right side of the fabric down.  Use the design located here to cut your applique pieces.


2. Remove the waste pieces from your mat leaving the applique piece still attached to your mat. Apply Elmer’s Washable school glue to the back side of your applique. Here is a live video I did on Facebook of this part of the process if you want to watch.


3. Carefully remove your applique from the mat to keep the fraying to a minimum. And apply the applique to a background square. Do each block one at a time so that the glue doesn’t have time to dry completely before you apply the applique to the background.


4. You can help to set it by using an iron and pressing for a few seconds. The glue will not hold the applique on permanently, but it will make it easier for you to move the applique blocks to your machine and temporarily hold it while you machine applique the pieces down. I use my Easypress2 to press it I like the even coverage of the totally flat pressing plate.


5. Machine applique with a matching thread and either a blanket stitch (mine is shown, number 7) or a zig zag stitch. Here is a video about raw edge applique:


6. Sew 4 rows of cornerstones and sashing together in the order shown. Press toward the cornerstones.


7. Sew 3 rows of blocks and sashing together in the order shown. Press toward the blocks.


8. Sew the sashing rows and the block rows together to form the quilt.

This is a sponsored conversation written by me on behalf of Cricut. The opinions and text are all mine.

Links found in this post may be affiliate links for which I may receive compensation at no extra charge to you.


Custom Post Signature

Custom Post  Signature