Happy Monday!

Monday, March 31, 2014
We are having a big sale tomorrow...


Coupon Code: NOFOOLIN
During special sales please remember that shipping might be slightly delayed. Also since the software that runs our website doesn't hold an item unless you check out with it, some things may sell out before you have a chance to pay for them. If you pay for an item that is sold out we will contact you as soon as we can. Please make certain that you use an email address where you can be contacted. Thanks so much.


Yep, I am still here...

Wednesday, March 26, 2014
Hi Everyone,

Again rumors of my demise have been greatly exaggerated. I know I have been really quiet lately... I guess I just got wrapped up in everything going on at the shop and forgot to tell you all about it :)

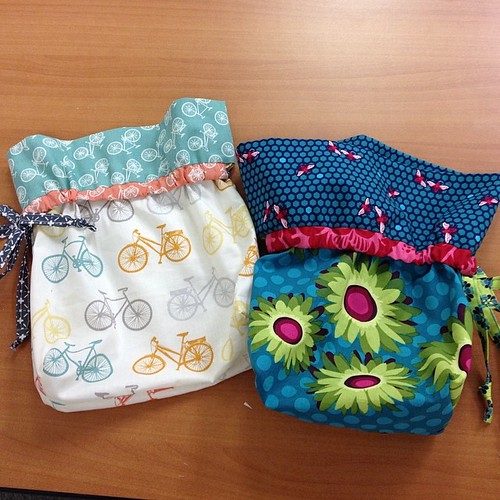
I haven't done a ton of sewing lately but the last things I made are these:


My evening endeavors!
I am using them as gift bags... having fun making them up in all kinds of sizes and colors. ** If you are local I will be teaching a short class / tutorial on how to make these this Saturday from 1-3pm at the shop. You can bring a sewing machine and make it along with me or just come down and watch me make one. We will have some kits made up for them. They are super simple. I am going to be doing a little class like this once a month until I run out of ideas. I am calling it "The Itty Bitty Project Party" you can find it on the class calendar on the website. If you plan on sewing along please RSVP (you can call or email you can find the phone number and email address here) we are limited to about 14 spaces.

Also if you are making the Gypsy Wife Quilt along with us we are doing a workshop this Saturday also from 11am -1pm to help with making the blocks if you are a little stumped. Come down and get some help if you need it. That is what we are here for :) Speaking of Gypsy Wife we have the patterns for sale now that the BOM is full you can find them 
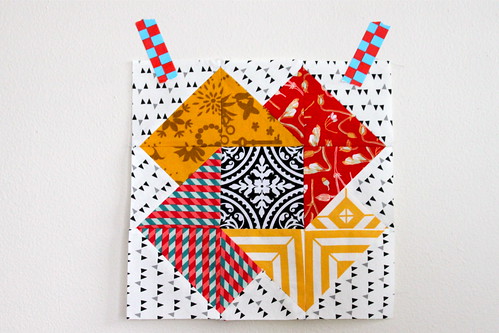
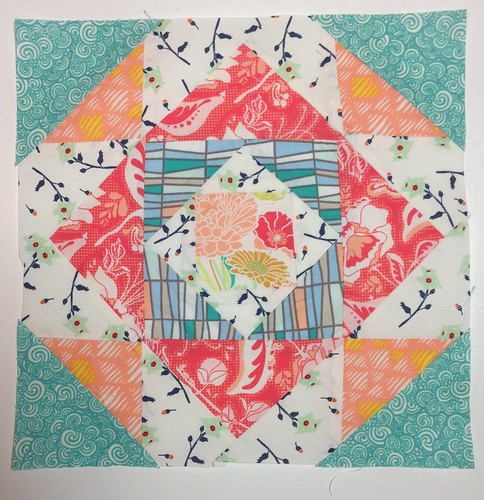
here. Here are some of the gorgeous blocks our BOMers are making:


From Kim S.


From Julie M.


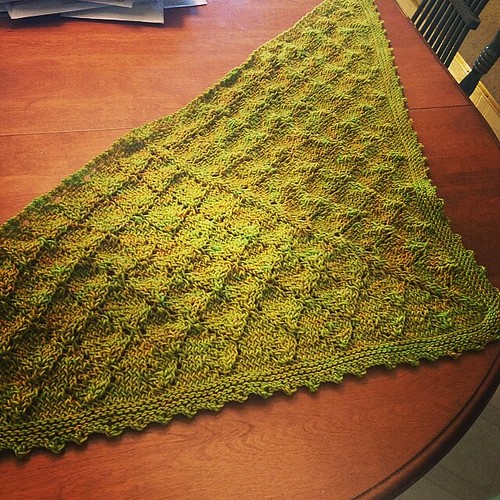
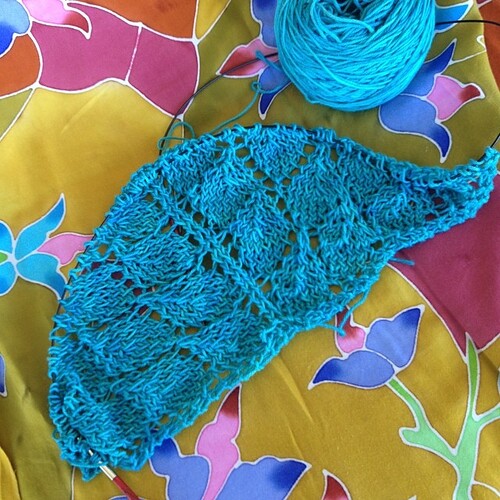
My latest obsession seems to be knitting. I have had a few occasions lately to need a hand project.  My daughter taking her High School exit exams etc. Knitting is so easy to just grab and go. Last week I made this lace shawl... 


This weekend I had a little getaway at a friend's house and she and I watched Sherlock and she cross stitched while I got started on another shawl:


This is the same pattern as the first shawl just a different color. 
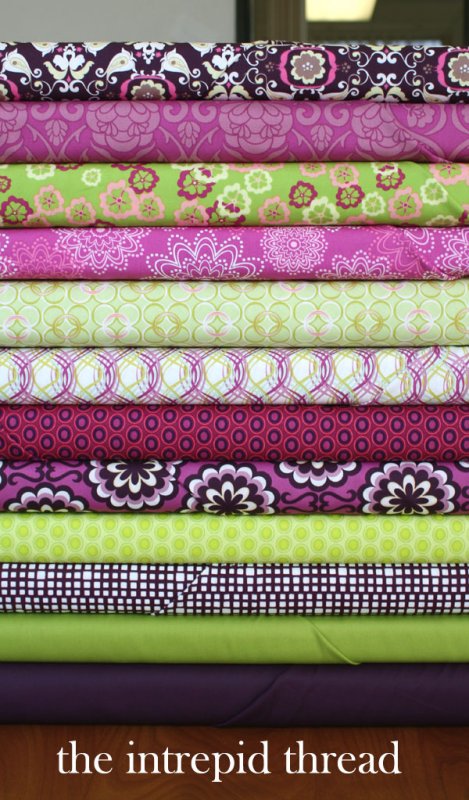
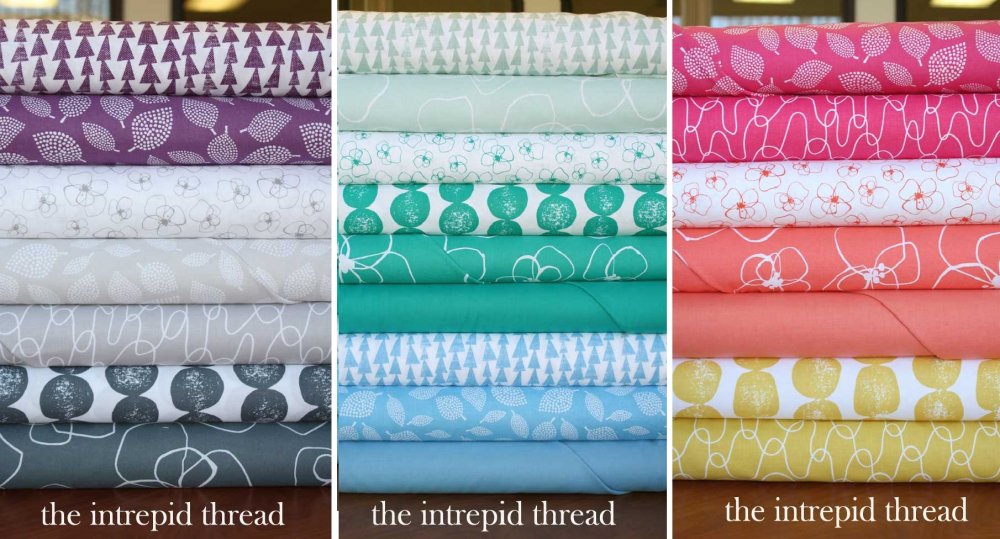
We got some bloc-loc rulers in the shop:

We also got Color Me Happy... I adore this collection. Even Vanessa says it's her favorite.


I also made these super fun bundles in what seems to be everyone's favorite combo :)

So how is that for a memory dump :) If you haven't taken a tour through the website lately you will see a lot of new fun fabrics. There are also a lot of super things coming soon... 

Talk soon (I promise ) ;)

Snowflake Things Quilt Tutorial

Monday, March 17, 2014
Today is brought to you by my friend Ruth of Pippin Sequim and Vanessa Christenson's Color Me Happy which is arriving in the shop this week. Take it away Ruth...


Hi folks!  I'm chiming in today to share a tutorial for this fun quilt that was inspired by snowflakes and radio antenna.  It's pretty quick to whip up since most of the blocks are cut from pieced strips, but the 60° triangle construction makes it a little different from your standard quilt.  And just so you know... even though it looks like there are hexagons, there are NO y-seams required!  This quilt is built from two types of blocks - low volume striped triangle blocks and sets of six blocks that together make up each snowflake thingy.  For the quilt above, I used 32 low volume blocks and 4 sets of 6 snowflake blocks. 

To make the low volume striped triangles:
  1. Cut four 2.5" strips of low volume prints.  I used fat quarters cut in the long (21-22") direction, but you can also use yardage and cut it width of fabric (WOF).  If you are using fat quarters, you should be able to cut 4 triangles from each strip set.  If you are using yardage, you should be able to cut 8. 
  2. Stack the four strips with at least one end even, and then cut the end at a 60° angle by aligning the 60° ruler mark with the long edge of the strips.


  3. Sew the four strips together along the long edges, aligning the angled ends so that the fabric meets at the seam line:


  4. Press the pieced strips, then use the 60° line on your ruler to trim the angled edge and remove any unevenness.


  5. Turn the pieced strip around for cutting.  Align the 60° line on your ruler with the top edge of the fabric and the edge of the ruler with the obtuse angle to cut off an equilateral triangle.


  6. Rotate your ruler (not the strip) to cut the next triangle.  Align the 60° line on your ruler with the bottom edge of the fabric and the edge of the ruler with the obtuse angle to cut off another equilateral triangle.


  7. Repeat steps 5 and 6 until the whole strip is cut.

To make the large Snowflake Things:
  1. Cut 6 sets of the light and dark print pieces indicated in the image below and arrange in stacks as shown. Make three stacks like the one on the left and three stacks like the mirror image on the right.  The short light prints next to each dark print can be cut in varying lengths between 1.5" and 2.5" long.  After sewing onto the dark prints, the resulting strip should be cut to the length indicated in the center.


  2. Sew together each stack and press.
  3. Align the 60° angle mark on your ruler with the bottom edge of each birthday cake and trim the all-background edge of each pieced pyramid.  Trim as close to the edge as possible. (See pictures below)


  4. Using the 60° angle mark on your ruler and aligning the corner your piece with the 9 3/8" mark, cut the remaining edge to make an equilateral triangle that is 9 3/8" long at the side.


  5. Pair the resulting 6 triangles into 3 sets, each having background strips pointing in opposite directions.  Sew a 1" foreground strip to each of the six triangles, using the same print for each triangle in the 3 pairs.  The strip should be sewn so that it's touching the short edges of the foreground strips in the triangles, as in the photo below.  Press seams.  


  6. Trim edges of the new strips to be even with the triangle edges.

  7.  
To make the small Snowflake Things:
To sew the smaller snowflake, use the instructions for the large snowflake, but leave off the bottom two layers (8.5" and 9.75").  Trim to a 60° triangle, then sew a 1" dark strip on the side and then sew a 10.75" by 2.5" light/background strip onto the bottom before trimming it all up.
 
Finishing the quilt top:
After you have your blocks finished and laid out, sew the top together in rows, using this guide to sewing 60° triangles.  Sew the rows together and then trim the sides straight to finish off the top.

Printable PDF here

Thanks Ruth! You are awesome!

Happy Monday...

Monday, March 10, 2014
We had a bit of a Fabric Avalanche on Friday but we were smack dab in the middle of a Shop Hop and I didn't get a chance to show you. I am so tired from the shop hop but it was fun!

Here are the pretties!

Mormor by Lotta Jansdotter I adore the bright but sophisticated colors in this. I find them so easy on the eyes and easy to use. See below for a picture from a customer...


Our customer Lucy was in on the first day of the Shop Hop and she bought some Pearl Bracelets, Mochi Dots and some Mormor... she made this adorable bag by Friday to use on the rest of her hop.


Sylvia Lotta's other collection is also here. I am having a good time with those Suvi sprouts :)


We have Petal Pinwheels Tile Pile prints. I ordered the whole collection but these came first so I made fun little bundles out of them. This is the collection that the Modern Quilt Guild is doing a challenge with.


And last but not least Atomic Tabbys I fell in love with the mid-century vibe of these and couldn't resist them...

I think my new favorite basic is that tiny guitar pick print.

Wednesday this arrives... Foxfield by Tula Pink.... so stay tuned.


Friday Fun Day! A free Tutorial day!

Friday, March 7, 2014
Hi Everyone,

It is Friday Fun day! We have a free tutorial for you today by Jamie Lee at Busy Bee Quilt Shop. Make this sweet sparkly "Dreamcatcher" quilt with a few fat quarters and some solids.

This was made with fat quarters of Daydreams by Kate Spain, Kona solids in Silver, Shadow, and Punch

 Daydreams Arcadia in Scarlett for backing

Here is a link to the tutorial PDF


Have a super fabulous weekend and join me in thanking Jamie for this lovely pattern!

Happy Monday!

Monday, March 3, 2014
Hi Everyone,

Sorry I was quiet last week. It was literally filled end to end with getting ready for a Shop Hop that the Brick and Mortar is in this week. I guess we get to make lots of new friends for 9 hrs a day for 5 days straight LOL

But while I was away look at the loveliness that arrived...

Tone on Tone Pearl Bracelets by Lizzy House

Been waiting on these forever... so pretty!

Also if you didn't see it over on Stitched in Color Rachel Curated bundles of prints and solids for making Anna Maria Horners Gathering Flowers Quilt


This is what I worked on this weekend:

Inside is the swap pincushion for our South Bay Area Modern Quilt Guild meeting tomorrow night. I am afraid if I show the pincushion my partner might know it is for her... this way it is incognito :) I thought up a way to make s simple quick drawstring bag that has no raw edges. Thinking about making a few knitting project bags like these for my yarny friends.

Have a super awesome week!  I will be buried until next Monday but I promise to show off some highlights on Instagram and the facebook page.

Custom Post Signature

Custom Post  Signature