Free Tutorial Quick and Witty Christmas Ornaments/Pincushions

Monday, October 22, 2018

Hi Everyone,

It is soon to be the season of ornament exchanges so I thought I would get you started off with some fun and funny ornaments or pincushions to make. These are quick and easy and sure to be a hit.

The Pincushions are made the same way as my Self Binding Napkins with a couple of changes at the beginning and end.  So go grab the PDF and then come back to this post.

Some links in this post are affiliate links.


Witty Stuffed Christmas Ornaments/Pincushions


 Here is the cutting file if you are using your Cricut Maker (this is special sale link $121 off the bundle price). These items were made using the Maker and the EasyPress2

Materials For Pincushion:
Red Foil Iron-on Material (I used this holiday color bundle)Or a glitter/metallic Paint Pen for doing your own writing.
Black Marker for the Maker (I used the 1.0 marker from this set) or a Permanent Fabric Pen For doing your own writing.
Purl Cotton in a coordinating color

Cutting if not using the Maker:
4 - 6 1/2" Squares of Holiday fabric
4 - 4 1/2" Squares of Light Solid Fabric

Instructions:

1.  Cut your fabric. If you are using the Maker Cut your Holiday fabric first using the rotary blade on your machine, add the black pen to the maker carriage and make sure your light solid fabric is right side up on the mat. The pen will do the black lettering for you then cut your squares. If you are not using the maker go to b. on the next step.

Here is a video of the cutting of the fabric and iron on and applying the iron on.


2. Make lettering. a. Making sure your machine is set to mirror place the right side of your foil iron -on down on the standard grip mat and cut your letters. b. If not using the Maker use a permanent pen to make your lettering in the center of your solid squares.

3. Iron. Using your EasyPress2 apply the iron-on to the squares, here is an interactive guide for the EP2 that will help with the temperatures and times. If not using iron-on press your marker to heat set it.

4. Sew. Make the ornaments and pincushions by following the tutorial for the napkins through step 12. Do not top stitch!

5. Stuff the squares. Through the opening at the side. Stuff your mini cushions lightly with polyfill for ornaments or stuff fully for pincushions. Hand stitch the opening closed with an invisible stitch and matching thread.

 Hand stitch the opening closed with an invisible stitch and matching thread.

6. Make Hanger for Ornaments. Using a tapestry needle and purl cotton, make a hanging loop at the top corner of each ornament by pulling through a length of purl cotton and tying a knot.
And you are all done!


Hope you love them!

This is a sponsored conversation written by me on behalf of Cricut. The opinions and text are all mine.

Love,

New Quilter's Planner Stickers

Sunday, October 14, 2018
Free November Planner Stickers

Hi Everyone,

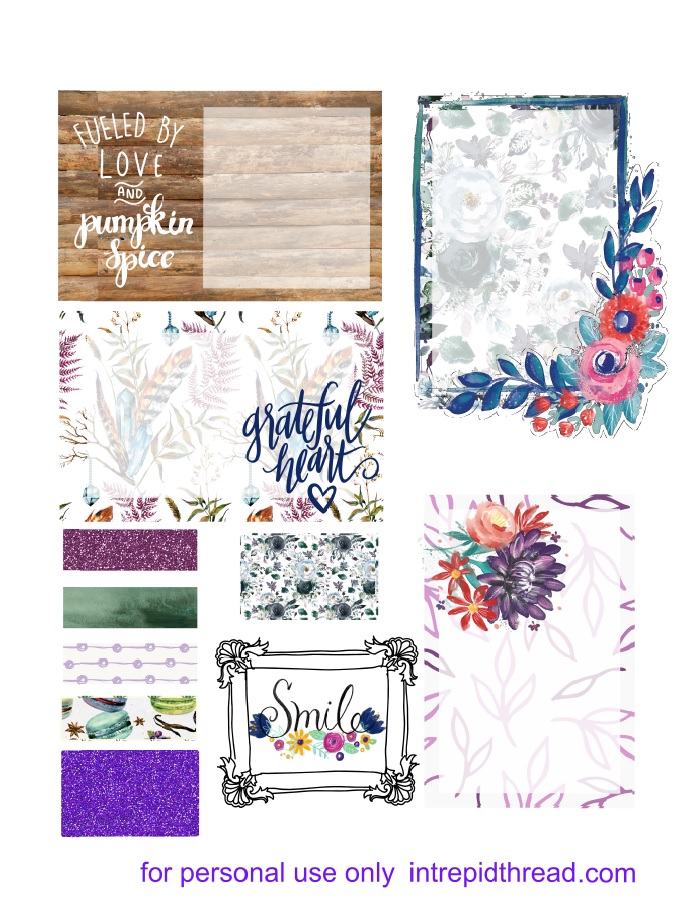
November Quilter's Planner stickers! I got them done just in time. I have surgery tomorrow. Wish me luck. Click here for the free stickers. I am no longer charging for them Use the menu above to go to the sticker page and download all of the stickers for free.

Here is a pre-view:
I hope you enjoy!

Love,

Beginnings Quilt Along Block 13

Saturday, October 13, 2018
Hi Everyone,

Here is another super simple block. I am having surgery on Monday and I am not sure how on top of things I will be afterwards so I wanted to make certain to get one more block ready for you before hand.

I have been trying to finish the video but unfortunately 3 of the files got corrupted so I am trying to get it pieced together. But again I don't think you need it this is a simple block with just a couple things I wanted to teach you about bias edges. So even without the video I am certain you can handle this.

If you are using the Cricut Maker here is the file for cutting.

The Beginnings QAL Block 13 (printable PDF)

Block 13 Windmill (8” Finished)
For One Block (that is what you need for the quilt)

Cut:
2 –  5” Squares of Background Fabric
1 –  5 ¼”  Square each of two Focus Fabrics

** all seams are ¼”

Instructions:

1. Cut the background squares in half once diagonally. Cut the Focus fabric squares in half twice diagonally. (Note: You may look at this picture and wonder why, since these are all right triangles, you need to cut some as half squares and some as quarter squares. The reason that we cut the squares this way is so that the straight of grain ends up on the outside of your quilt block. If you cut the smaller triangles as half squares the bias edges would be on the outside of your block and it would get stretched and distorted out of shape in your quilt. If you have ever seen a wavy quilt that has had blocks or borders stretched you will know what I am talking about.)

2. Stack up your focus fabric triangles so that there are four of the same triangles in each stack and place them with the right angle sides matching. Whichever print you place on the right side will be the one that is in the center of your pinwheel. (as you see I have it opposite of the illustration but that is okay ?? ) Sew the focus fabric triangles together on the right angle side as you have them laid out. Be careful not to stretch the triangles as you sew, use a light hand. Press (it doesn’t matter which direction this time)


3. Match the background triangles to the larger triangle units formed by the focus fabric triangles and sew. Press toward the focus fabric.

4. Square your blocks up to 4 ½” square.


5. Lay out the small blocks so that they form a pinwheel see the picture for step 3.


6. Match up your seams so that they nestle and sew the two rows together. Press the top row to the right and the bottom row to the left.


7. Put a pin through the back at the point at the center on one row then through point in the center on the other row and with the pin standing straight nestle the seams. Put a pin in either side of the center pin then remove the center pin. Sew ¼” seam being careful to sew over the point at the center seams. And you are done!


Hope you enjoy this sweet block!

Love,


Beginnings Quilt Along Block 12

Tuesday, October 2, 2018
Hi Everyone,

 Here is the first of the blocks for our big push to get finished with our quilt this month. I Was literally buried under fabric last month and unable to get even 5 minutes to get these tutorials done. I have had the blocks finished the video filmed since the middle of August.

Speaking of Video. I am not posting it with this block. This is a super easy block and I am pretty certain you can do this one without the video. I do have video for it and it will be posted with the next post. The video incorporates all of the last 4 blocks.


If you are using the Cricut Maker to cut your blocks you can find the cut files for this block here.

The Beginnings QAL Block 12 (Printable PDF)


For One Block (that is what you need for the quilt)
Cut:
2 –  1 ½”by 8 ½” rectangles of Background Fabric
1–  3½”by 1½” rectangle of Background fabric
2 –  3 ½” squares of Background fabric
2 –  1 ½” squares of Ear Fabric
1 – 3 ½” by 7 ½” rectangle of Body Fabric
1 – 3 ½” by 5 1/2" rectangle of Body Fabric

** all seams are ¼”


Instructions:

1. Mark a diagonal line on the back of each of the 1 ½” ear fabric squares and one of the 3 ½” squaresof background fabric.

2. Place ear squares on the each side of the background 1 ½” by 3 ½” rectangle as shown. Make sure the diagonal line goes from top left to bottom right on the left side. And the Top right to the bottom left on the right side.


3. Place background 3 ½”  square on the right side of the body 3 ½” by 5 1/2” rectangle as shown. Make sure the diagonal line goes from top left to bottom right.


4. Place the unit created in step 1 on the top of the body  3 ½” by 7 ½” rectangle and sew them together.

5. Place the background 3 ½” square on the top of the unit created in step 2 and sew.

6. Place the unit created in step 5 to the right of the unit created in step 4 and sew.

7. Place the background 1 ½” by 8 ½” rectangles on each side of the cat and sew.

And voila you are done!
I hope you fun making this adorable block. It is so quick and easy and makes a great fun quilt.

See you next week with our next block...or maybe 2.

Love,

How to make a Bohemian Style t-shirt with Cricut EasyPress 2

Wednesday, September 26, 2018
Have you ever wanted to make your own t-shirt design? Do you have a great saying that is quintessentially you that needs to be displayed on your person? Is it hard to find graphic t-shirts in your size or in a style of t-shirt that you like? I am going to show you how to make your own on a t-shirt that you already love with the Cricut Maker and the Cricut EasyPress 2.

Bohemian Embroidery Cricut EasyPress 2 Tutorial

Links in this post may be affiliate links. If you decide to buy something then I might get a bit of compensation for my time and effort at no extra cost to you. This post is sponsored by Cricut.


I know sometimes the most daunting part of getting a new gadget is how to use it and in this case it is just a matter of learning to use the software. It is not hard at all, if you can use a sewing machine you can do this, I promise. I made this video to show you how I made my designs:


I walk you through my design process in the video so it is a little bit longer than my usual videos.

Here is a link to the design that I used for the teal over dyed t-shirt and the tattoo designs that I can't wait to put on my sleeves.  

Now you have heard all about the Maker from me before. So I don't need to tell you how much I love her.

When you open these designs they will look something like this:


At the bottom you will see a button that says customize. You will click on that button.


The Design will come up and you will see all of the pieces that you or I have put in. In this case I made this design in a few colors. I thought it would be cool to cut it out of a bunch of colors and layer it to make an embroidery type design. I didn't want to make this first tutorial too complicated though so I am just using the white this time around. 

 Since this design is already ready to cut for you all you need to do is click Make It (the green button).
 Here on the left side just under the space that says 12"x12" (that is the size of your mat by the way) there is a little toggle that says Mirror and then a switch and you can switch that on and off. If you are cutting something that has a left and right and needs to go the right direction (like words) then you need to switch the mirror on. The reason that you have to mirror is that you will be cutting from the back of the material. 

Click the continue button at the bottom.
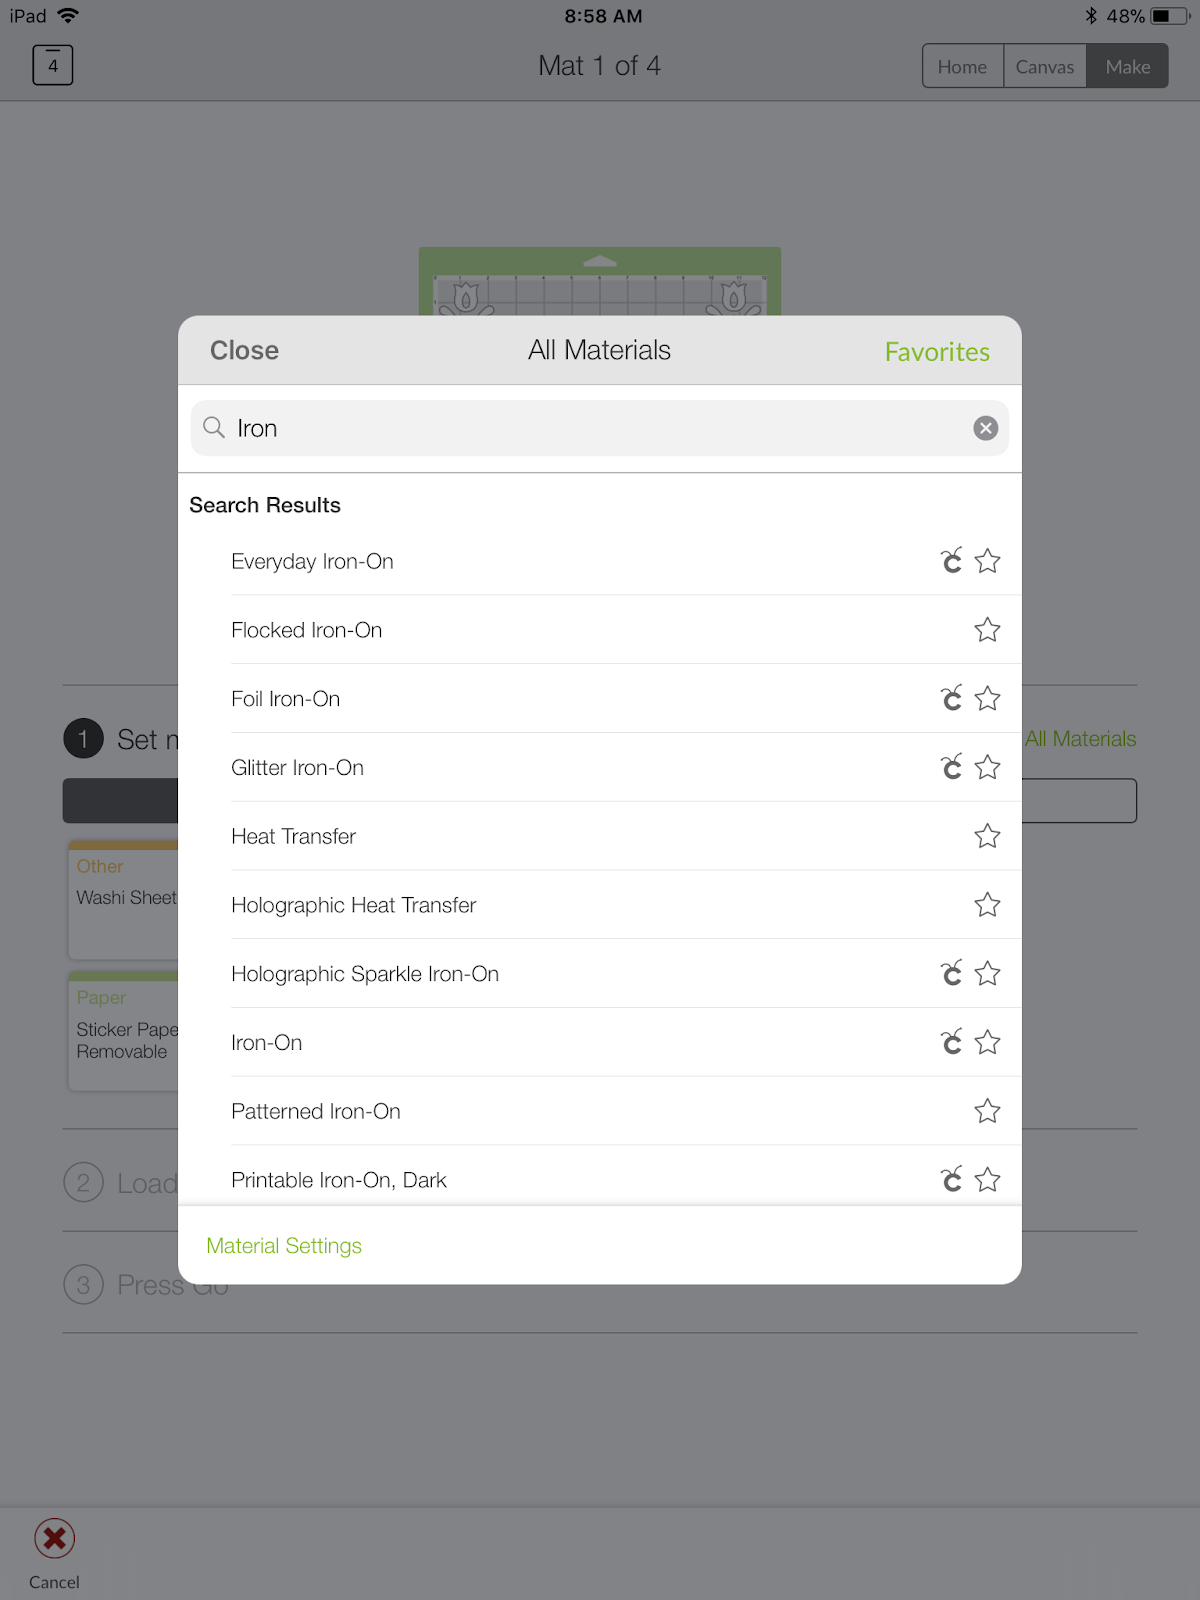
You will get a cutting screen like this... It gives you three steps and all you have to do is follow the numbers. You will choose your material that you are cutting. As you can see the favorites that I have set are here on the screen... I cut a lot of cotton with my Maker :) ... but since the Iron On is not on my favorites I will search for it by clicking the green writing that says "All Materials"
In the Search bar I just type "iron" and these pop up for me. I can choose the kind of Iron-On I am using. In this case I just choose regular Iron-On. The patterned iron-on that I used for my purple shirt (I will show that a little later) is lighter so I would definitely want to use the proper setting for that.
Once I choose the proper material the second step is to load the mat with the material and put in the proper blade. The software tells me which blade to use and how to load the mat.

I place the vinyl shiny side down on the mat and use my brayer to smooth out the air bubbles.


 Third step tells me to press Go. And once you are to this step the machine Go light will start flashing:
It's the one that looks like a little "c" with antennae.

Press the button and watch it do it's thing...

 Once it is done you will have to weed the vinyl. What that means is you will have to remove the excess material from the transfer tape so that you have just the design that you want on the tape. There are great tools for this called weeding tools they look like this:


These are the designs that I am using. I left some of the pieces in that could have been weeded out because I liked the designs a little simpler. This was a simple one to weed it only took about 3 minutes. I had a video but thought it was too boring :) Then I added it to the end of the video I linked above :)


Next I used the washable marker to mark the center of my shirt at the top and a few inches down so I could get my design straight.
Then I placed the design on the center and lined it up to make sure that it looked how I wanted it to.


Then I plugged in my EasyPress 2. 
And my whole world changed... just kidding but it was pretty epic! The EasyPress 2 is so awesome. For one thing it comes in 3 different sizes. There is one that fits every project. For the t-shirts there is one the is 12"x10" so it can cover the front of the t-shirt easily. There is a nice 9"x9" to fit kids t-shirts or a maybe a pillow. And the cute little mini that I have is 6"x7" which is great for baby onsies, sleeves, pockets...and all of your small item needs. As you will see the small one works great for the t-shirts too. So really pick the size that you think you will use most but know that they all will work on pretty much anything :) 

I use the easy tool at this link to figure out how hot to set my temperature and how long to press my project. It heats up super fast, much faster than my iron and has a ceramic heat plate that ensures you get even heating across the whole surface. It goes all the way to 400 degrees. I am so amazed that you can get professional results in less than a minute with these easy portable machines. PS. isn't that raspberry color so awesome?
I put the EasyPress Mat inside the t-shirt in preparation for pressing. It keeps the press from damaging any surface that you are working on. Oh and while I am mentioning that (surface protection) the press itself comes with an insulates safety base that it sits in while it is heated that protects your work surface as well. as you can see I am using the mat on top of my cutting mat and doesn't hurt it at all.
Following the guide I pre-heat. Then position my iron-on. Then use the EasyPress 2 by placing it on, applying light pressure and pressing the Go button... it counts down the time for me and when it beeps it is ready to be removed. I was going around the v-neck on this t-shirt so I pressed it 3 times in all. Then removed the transfer tape. You can see video of that process at the end of the video that I linked above.

Then I applied the designs to the sleeves the same way and Voila! I was a little worried to use this on one of my favorite t-shirts since it get's washed often but the Cricut Everyday, Glitter and Sportflex Iron-On are all designed to go through 50 or more wash and dry cycles... Not only that but most of their Iron-On materials have a Stongbond Guarentee that says if they are applied according to direction they are guaranteed and they will be replaced for free if you are not satisfied.


Here the other shirt I made that I really love.. I am hoping to make a little collection of sewing and quilting related t-shirt designs.

Quilter's T-shirt
I used glitter iron-on and a patterned iron-on by Anna Griffin.

I hope you love this and I will see you next week with ALL ... yes I said ALL of the rest of the blocks for our Beginnings QAL.

Love,

This is a sponsored conversation written by me on behalf of Cricut. The opinions and text are all mine.

New Quilter's Planner Stickers

Saturday, September 15, 2018
Free October Planner Stickers

Hey Everyone,

I know it has been a couple months since I made stickers for you all. But I have been super busy. Here is a whole passel of free stickers. I have decided to do them for free from now on so I don't have to feel guilty if I miss a month.

I am still an affiliate for that adorable Quilter's Planner. This time with Bonnie and Camille theme. They start shipping soon... for next year. It comes with a sweet magazine and a bunch of patterns.

Here are some pre-view pics...

Free Planner Stickers from The Intrepid Thread

Free Stickers from The Intrepid Thread

Free Planner Stickers from Intrepidthread.com

Free Stickers from Intrepidthread.com

I hope you enjoy them :)

Love,

Custom Post Signature

Custom Post  Signature